
Creating a Custom App on Shopify to Connect to Onramp
Below is a video walking through the full process of creating a custom app, as well as a step-by-step guide:
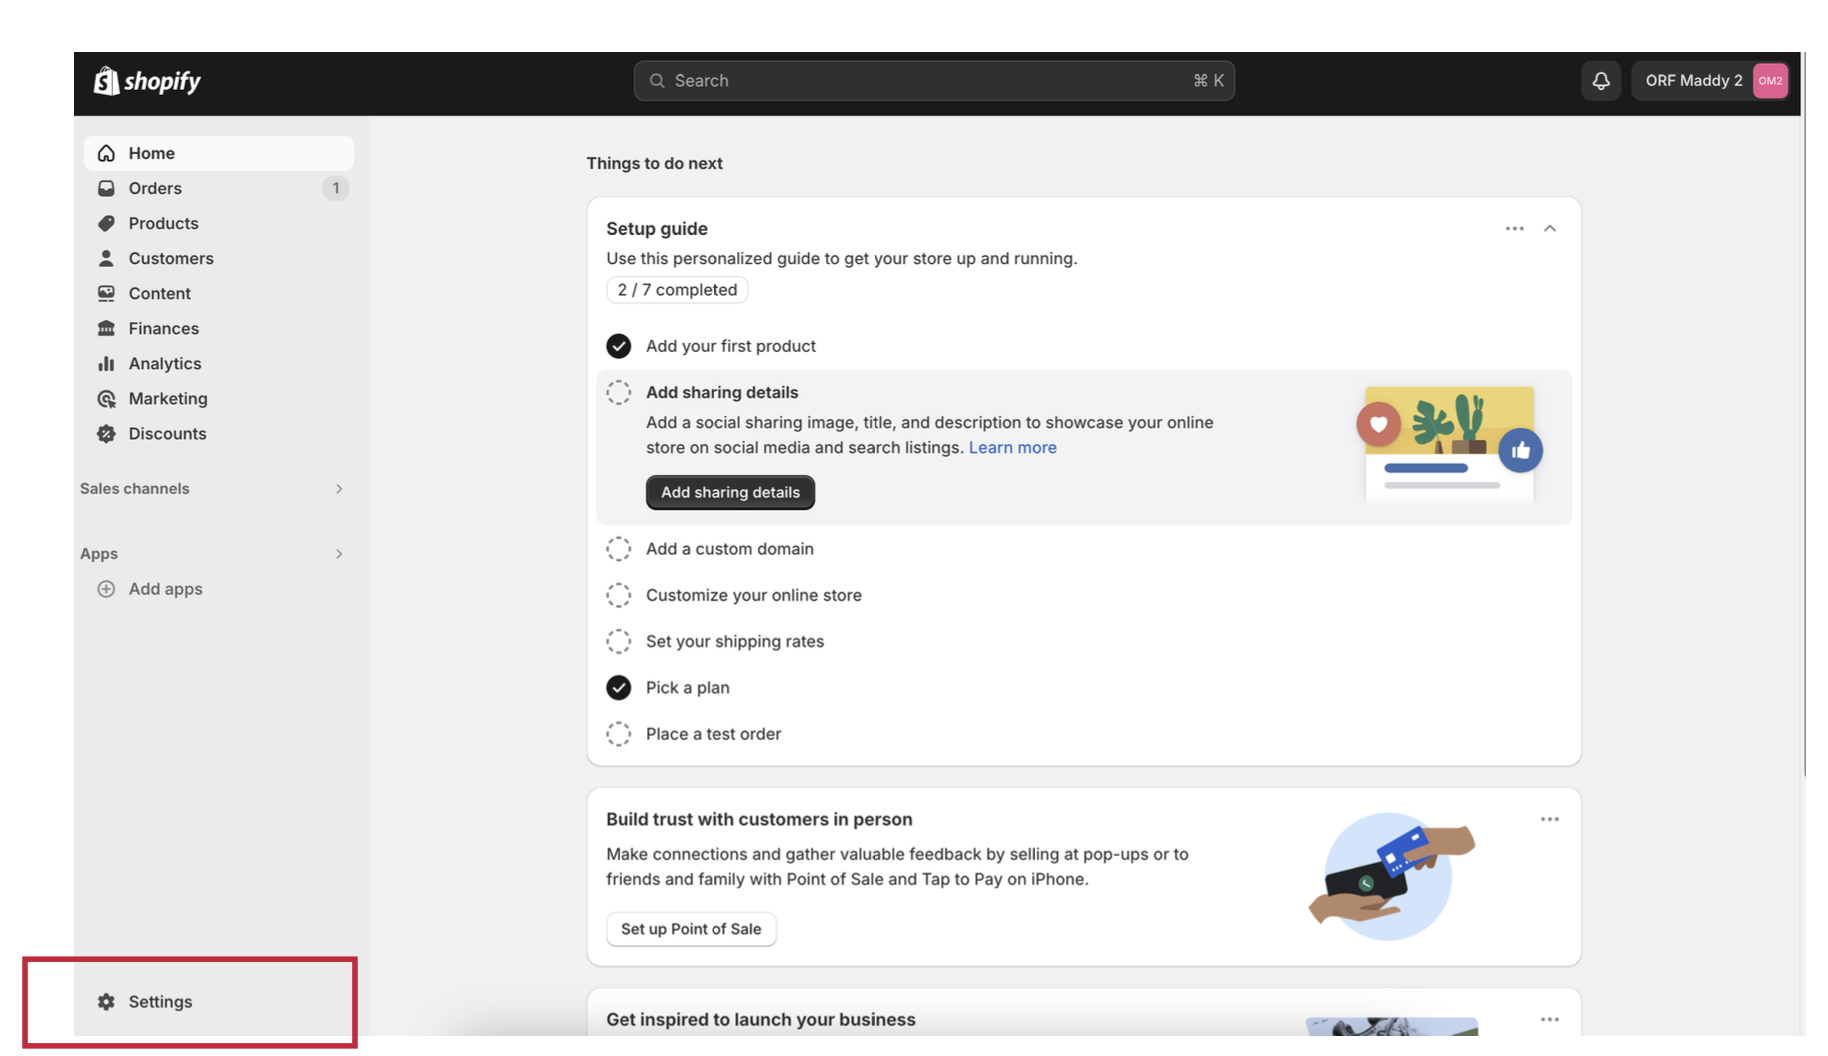
1. Go to Apps in Shopify Admin
Login to your Shopify Admin Account and navigate to Settings in the left navigation
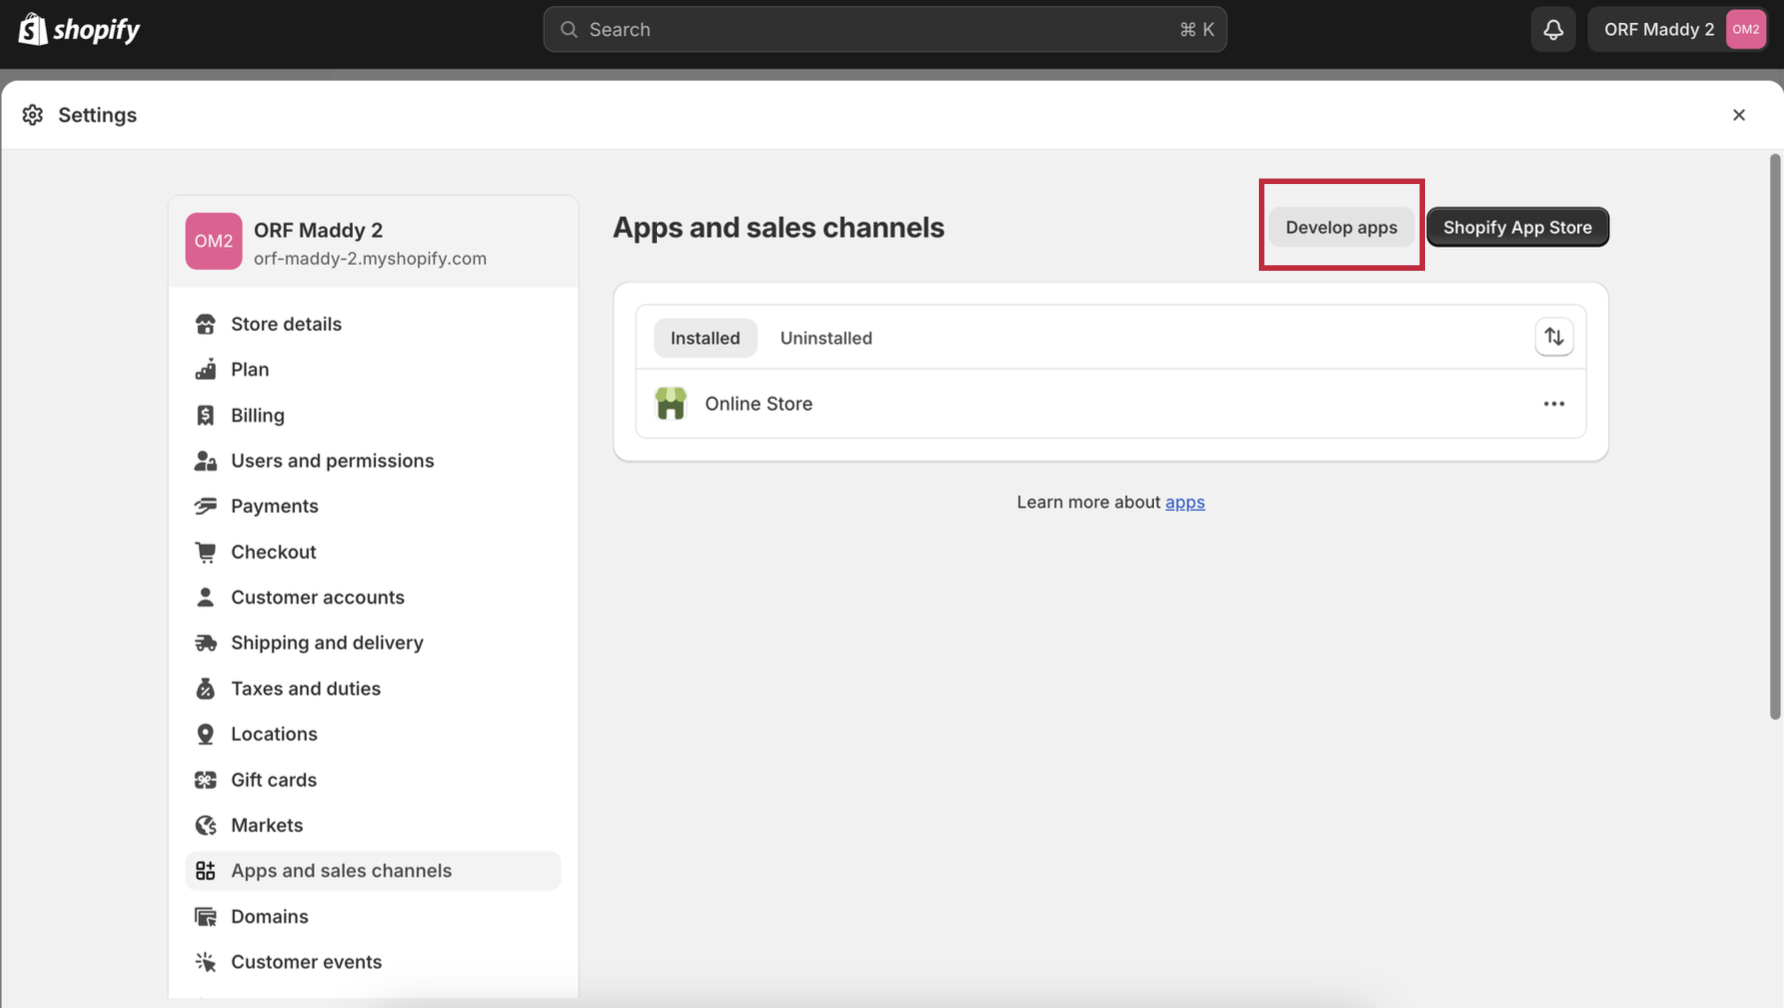
2. Click "Apps and Sales Channels" in the left navigation
3. Click "Develop Apps"
NOTE: If you do not see a button for "Develop Apps", please follow the "Private App" instructions here.
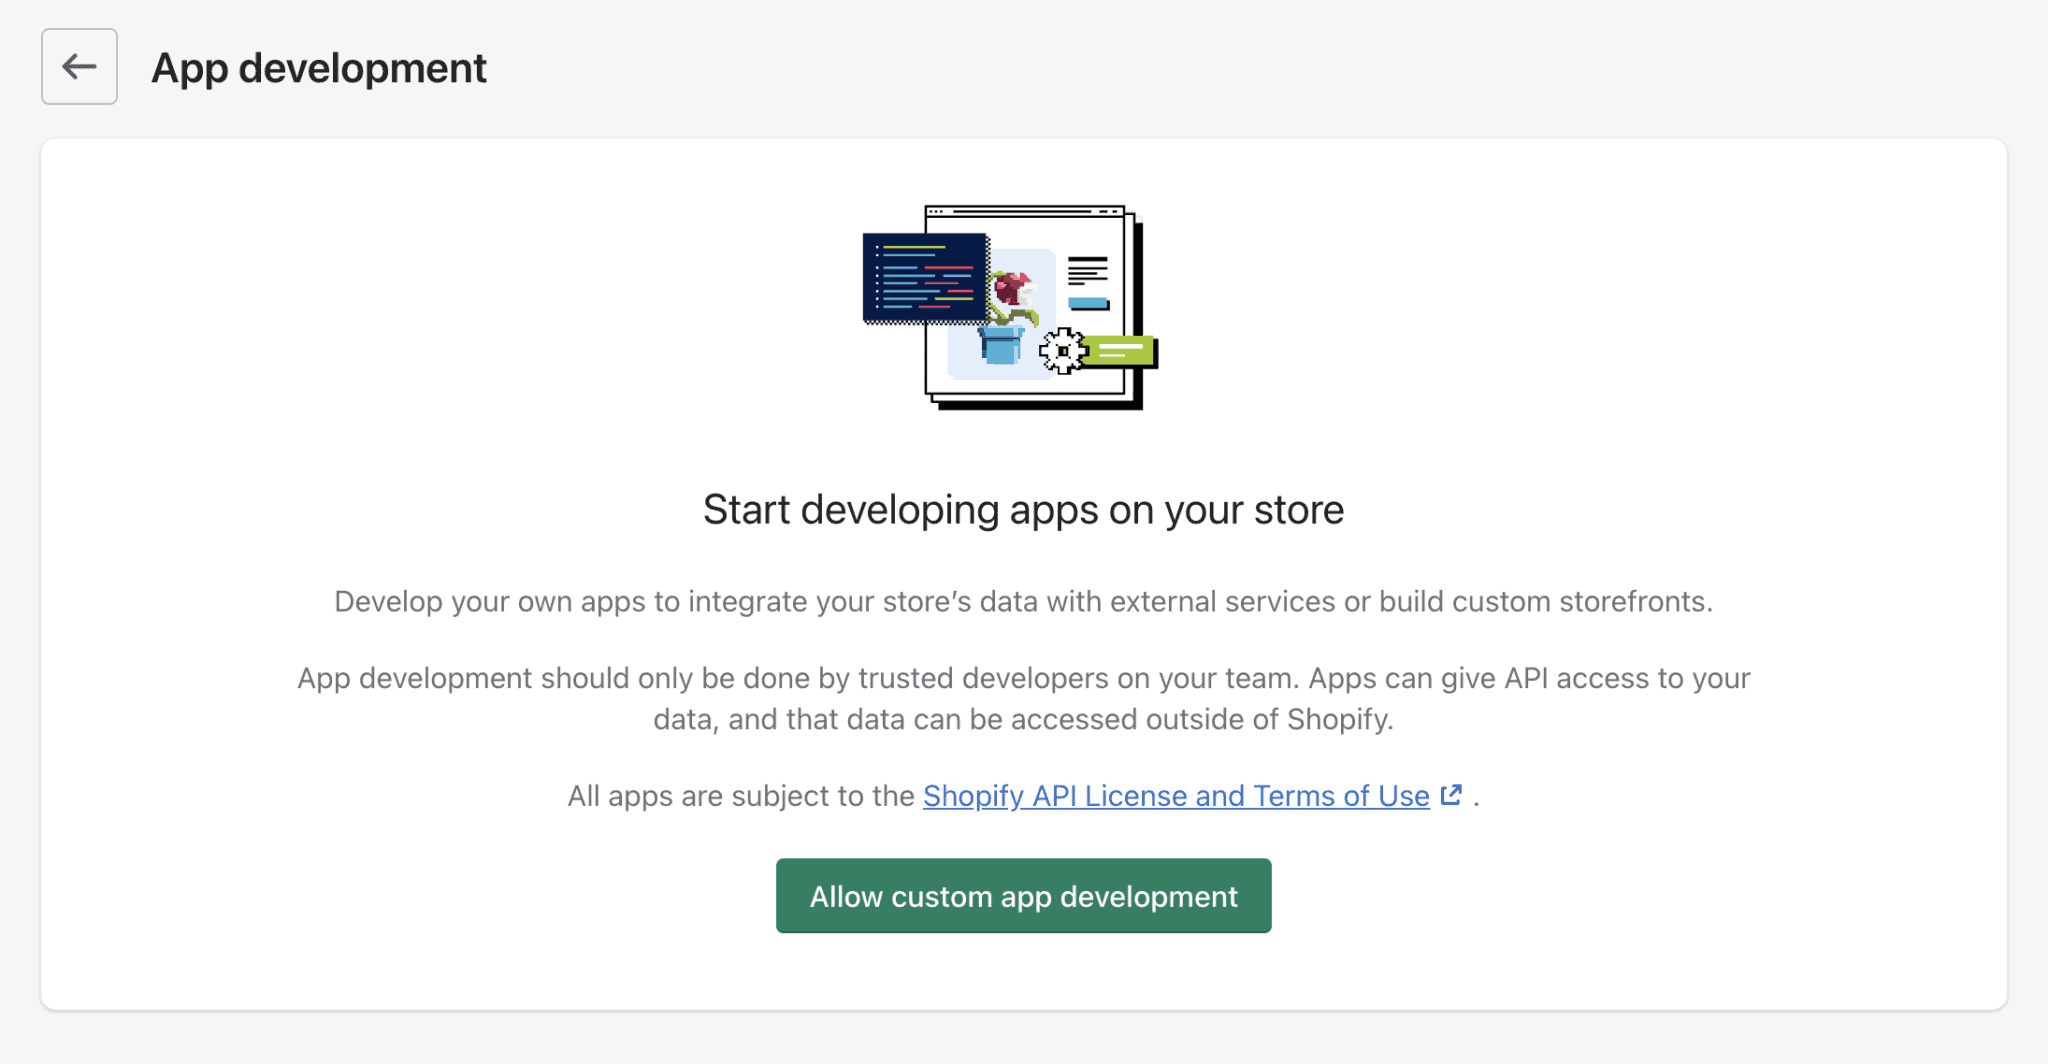
4. Enable custom app development
If you have already enabled Custom App Development, skip to the next step.
If not, you'll see a prompt to do so:
- Click Enable custom app development
- Read and check the terms, and then click Allow custom app development
5. Click "Create an App" in the top right corner

6. Complete the details field
- App name: Onramp
- App developer: choose any Shopify user in your store - or leave as default
Click Create app

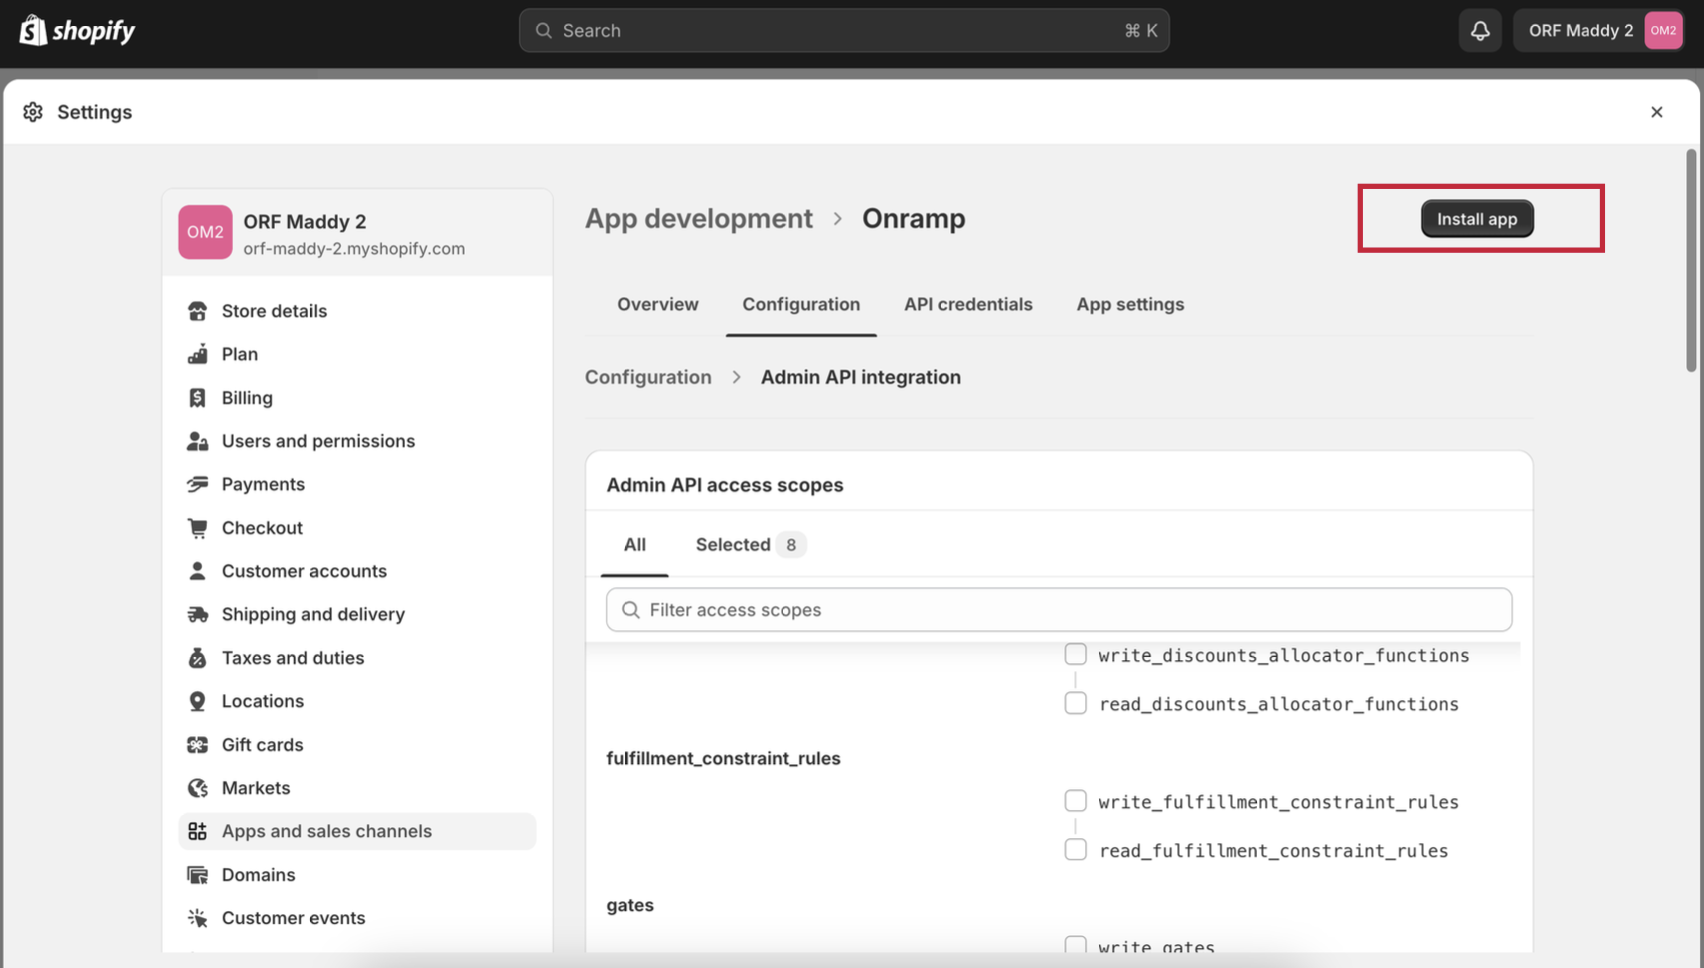
7. Click Configure under Admin API Integration
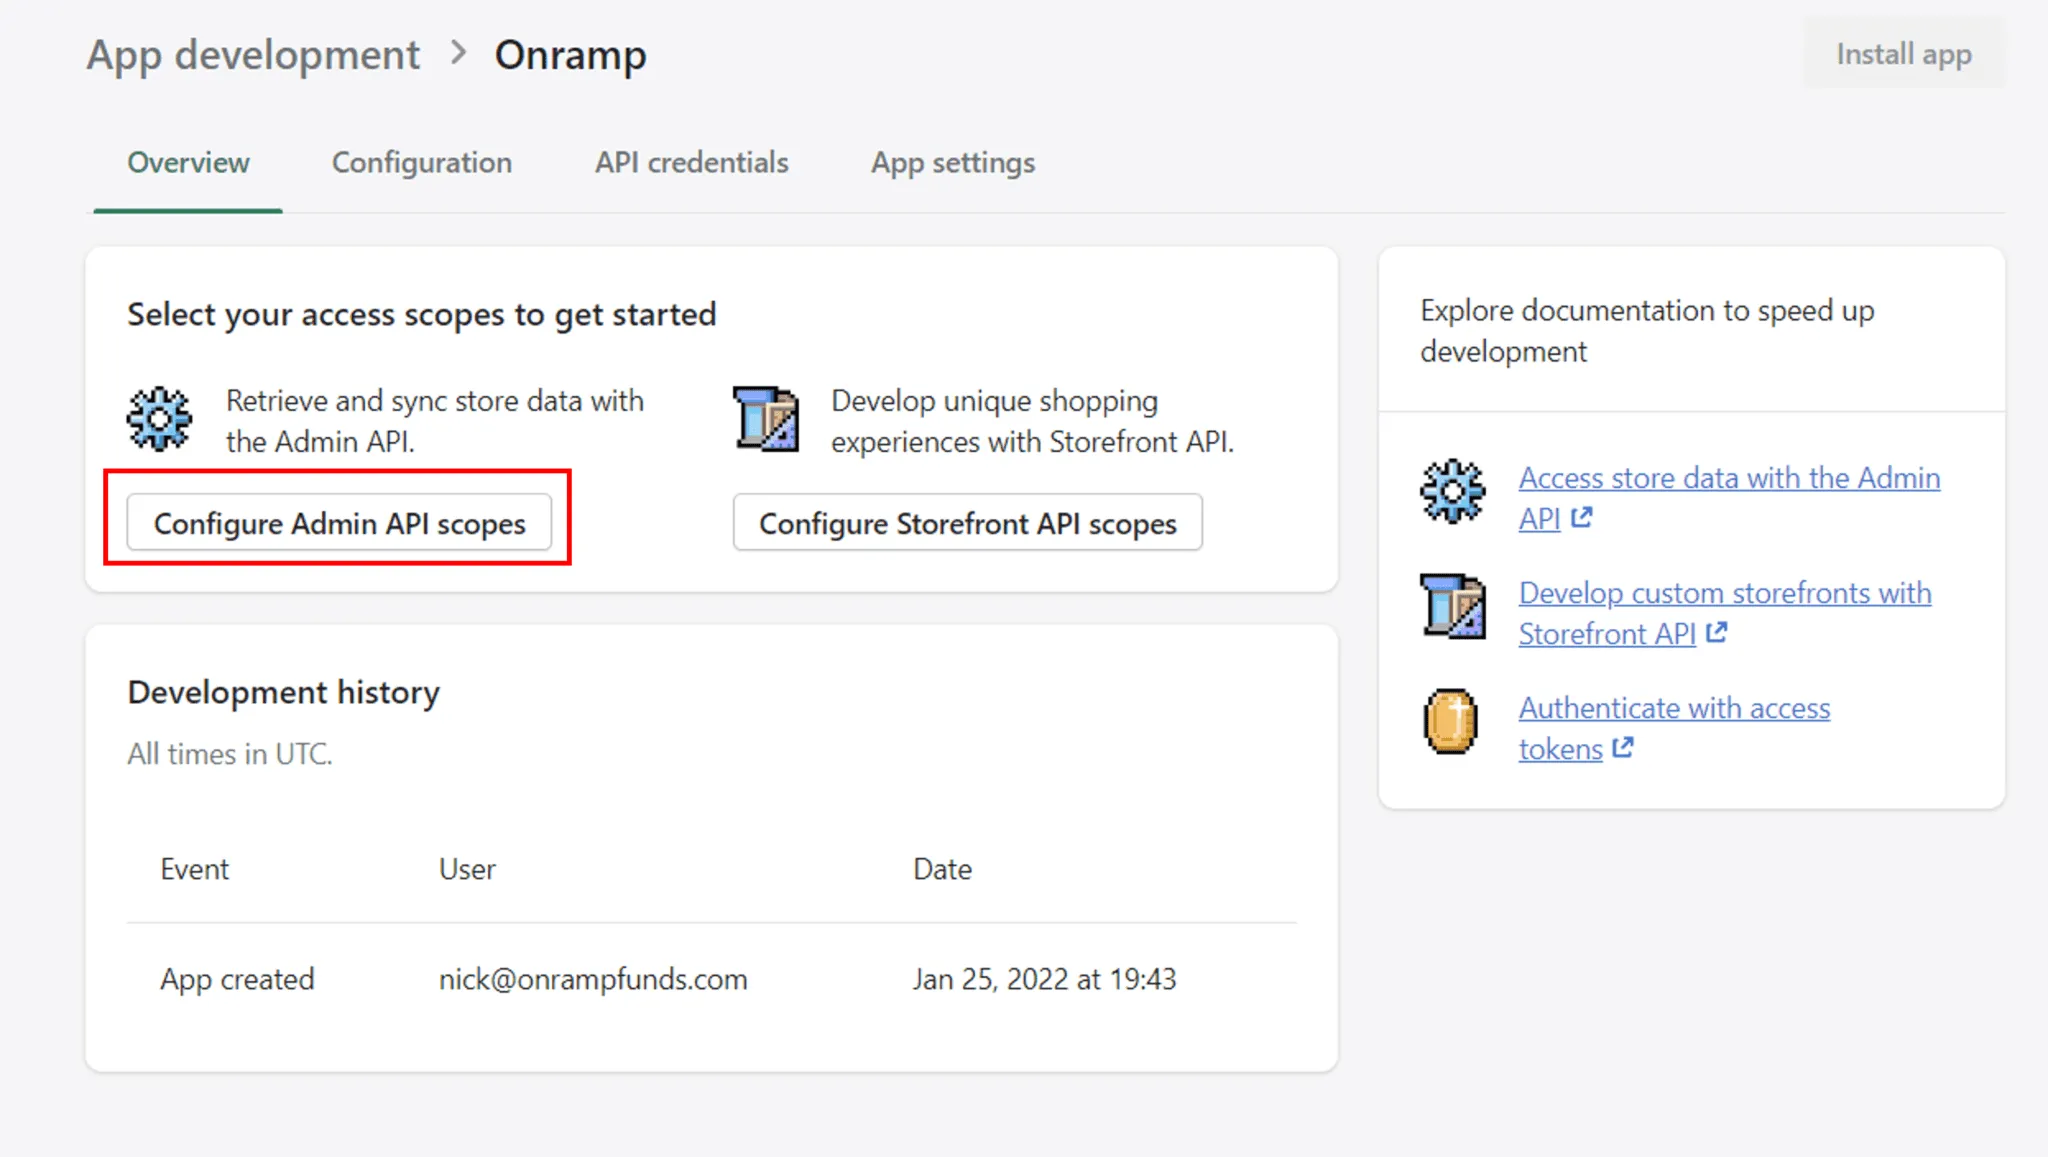
8. Check Read Access for the following fields to integrate to our API:
- read_fulfillments_services
- read_inventory
- read_locations
- read_orders
- read_product_listings
- read_products
- read_shopify_payments_accounts
- read_shopify_payments_payouts
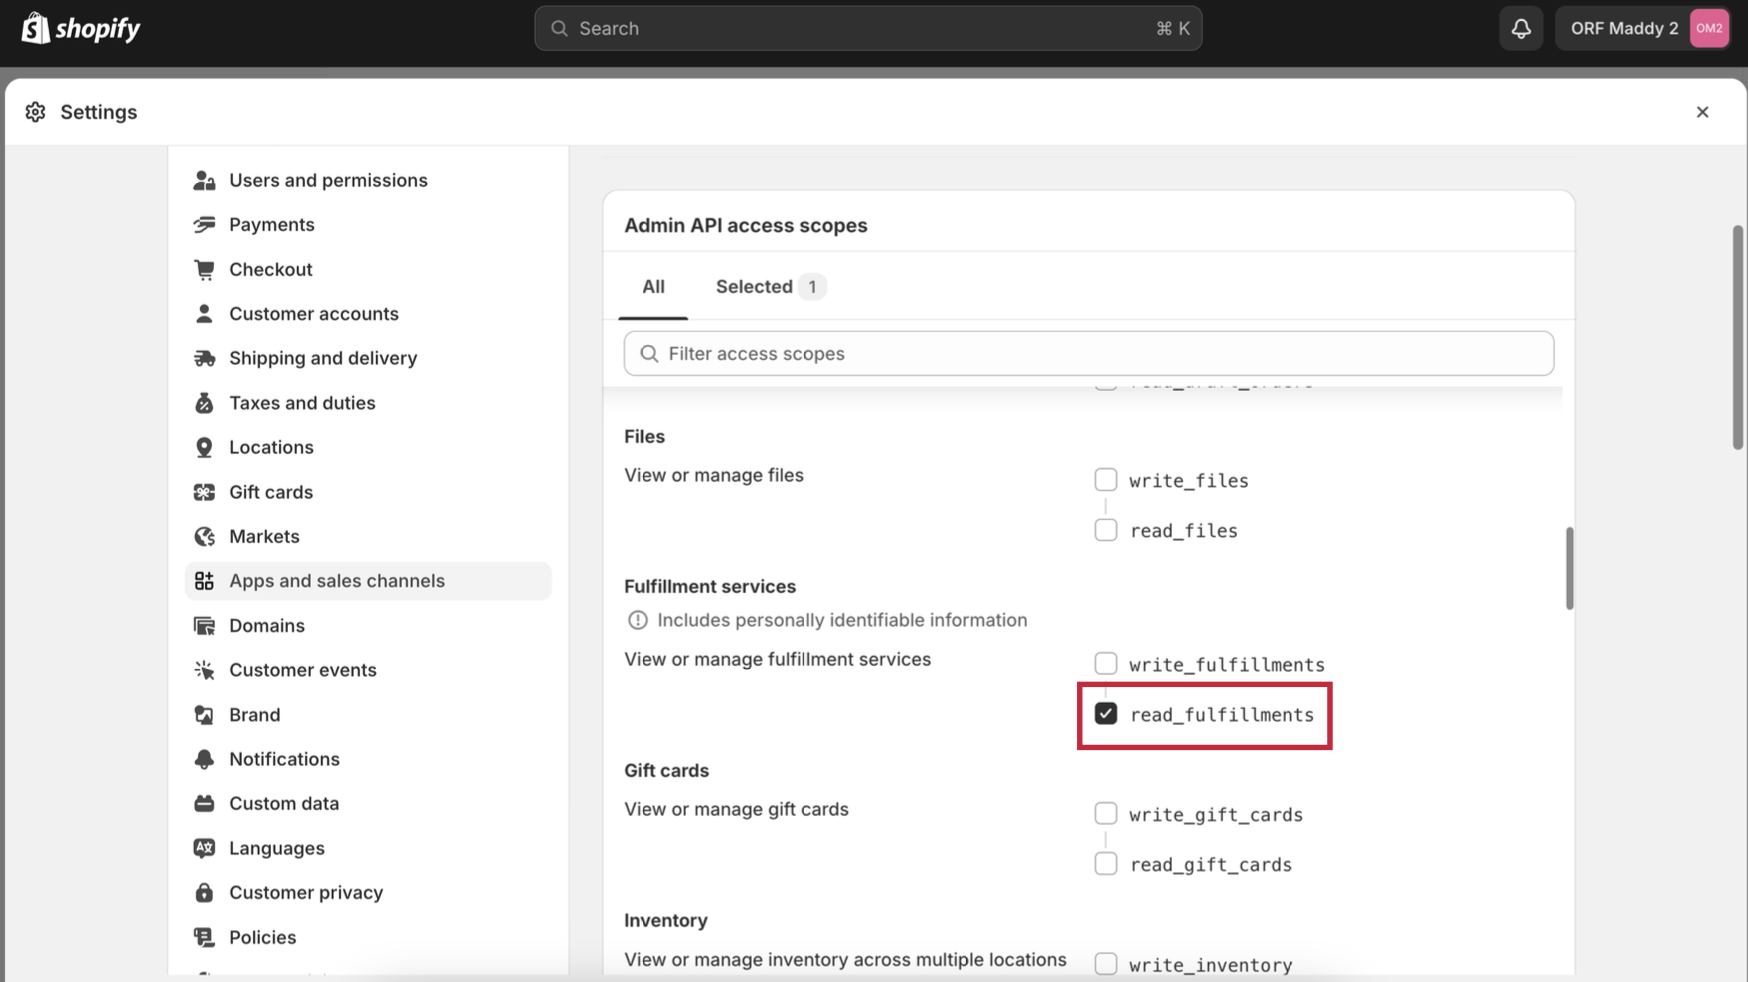
9. Click "Save"

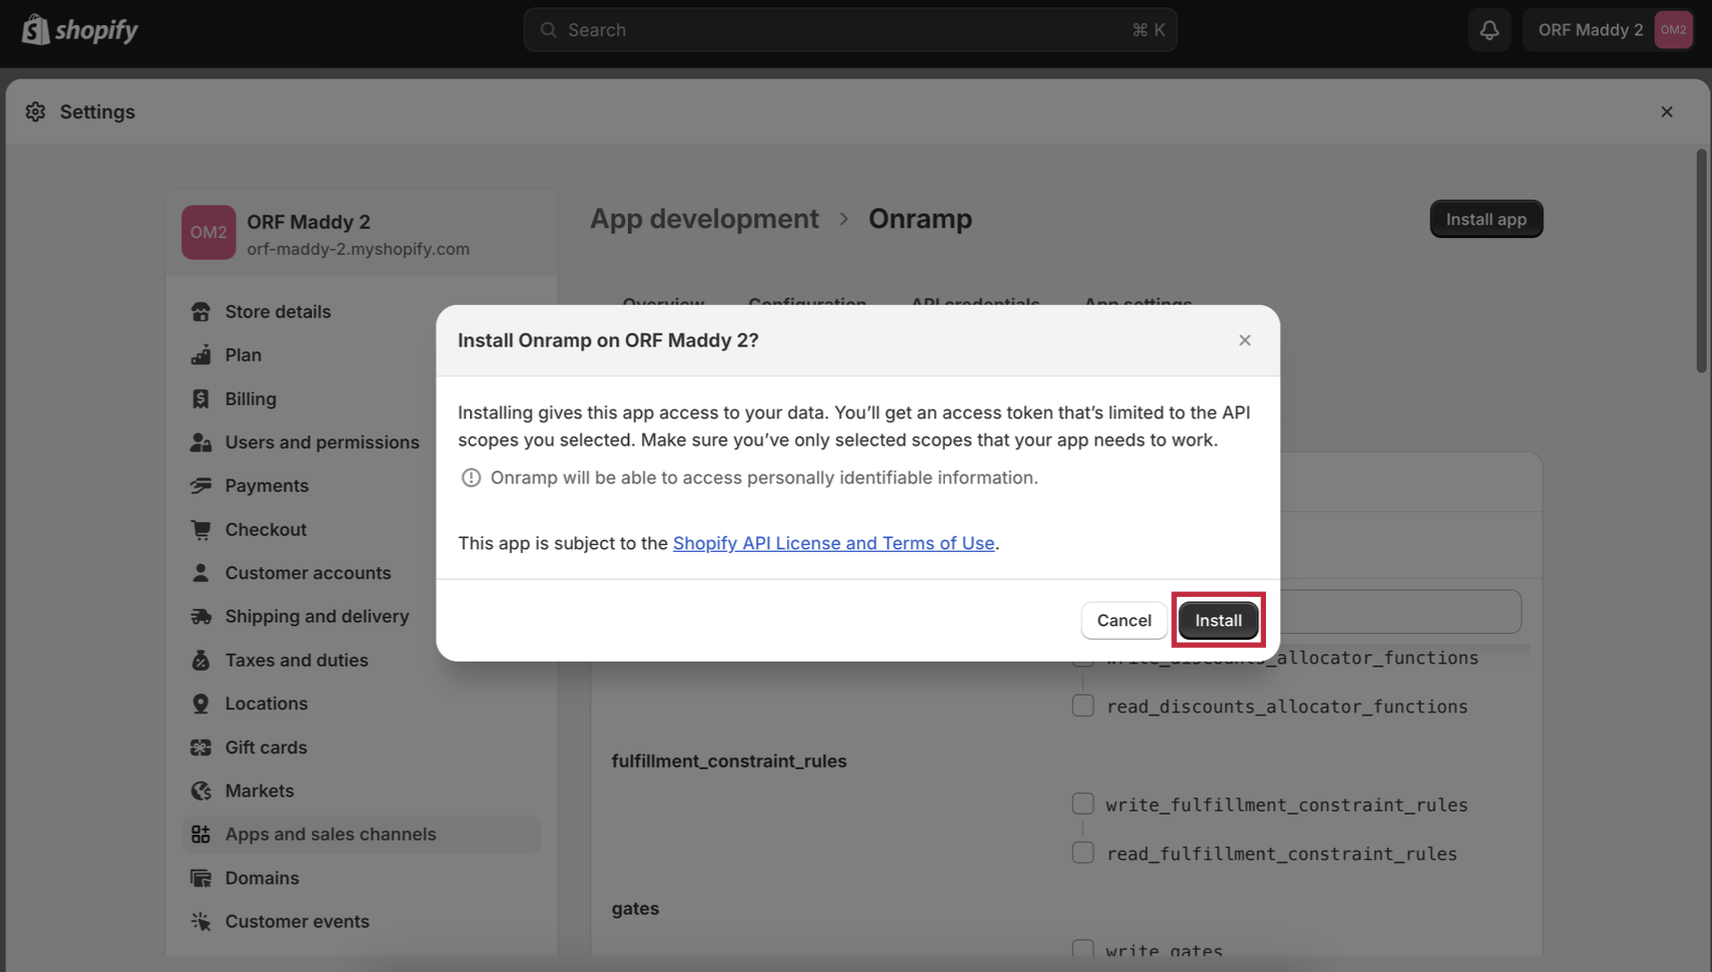
10. Click "Install App"
You can confirm the correct scopes are included by reading the list in Admin API access scopes.
11. Click "Install"
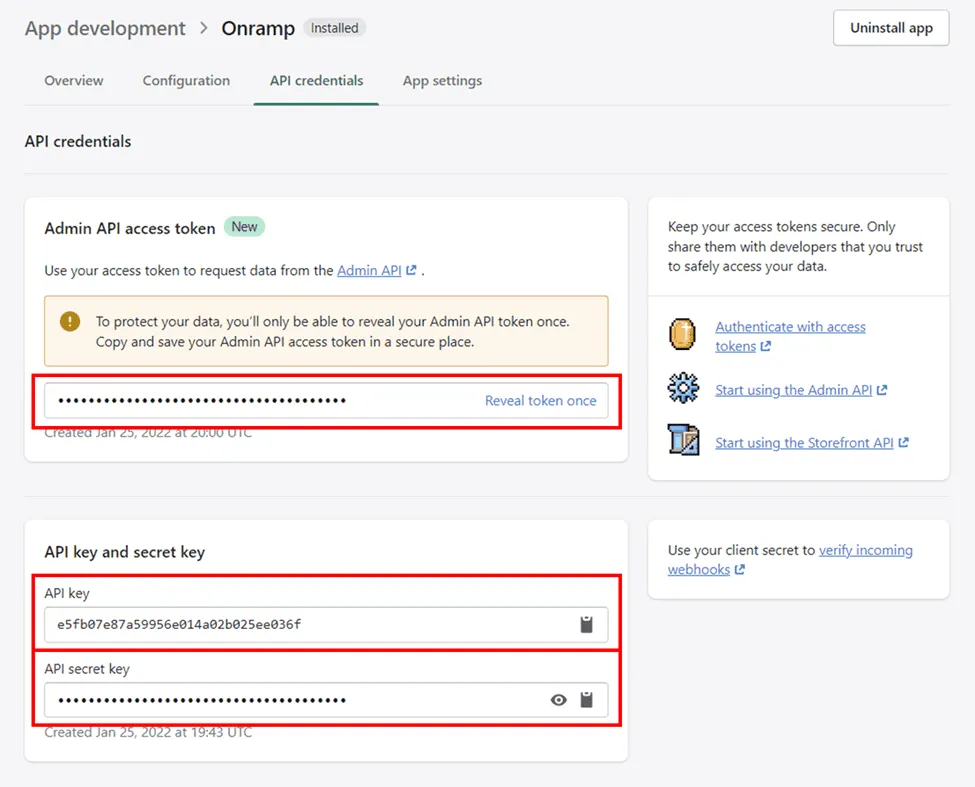
12. You will then receive 3 pieces of information needed to connect
Leave this page open.
- Admin API access token - be sure to copy this right away -- Shopify will only show this data one time
- API key
- API secret key
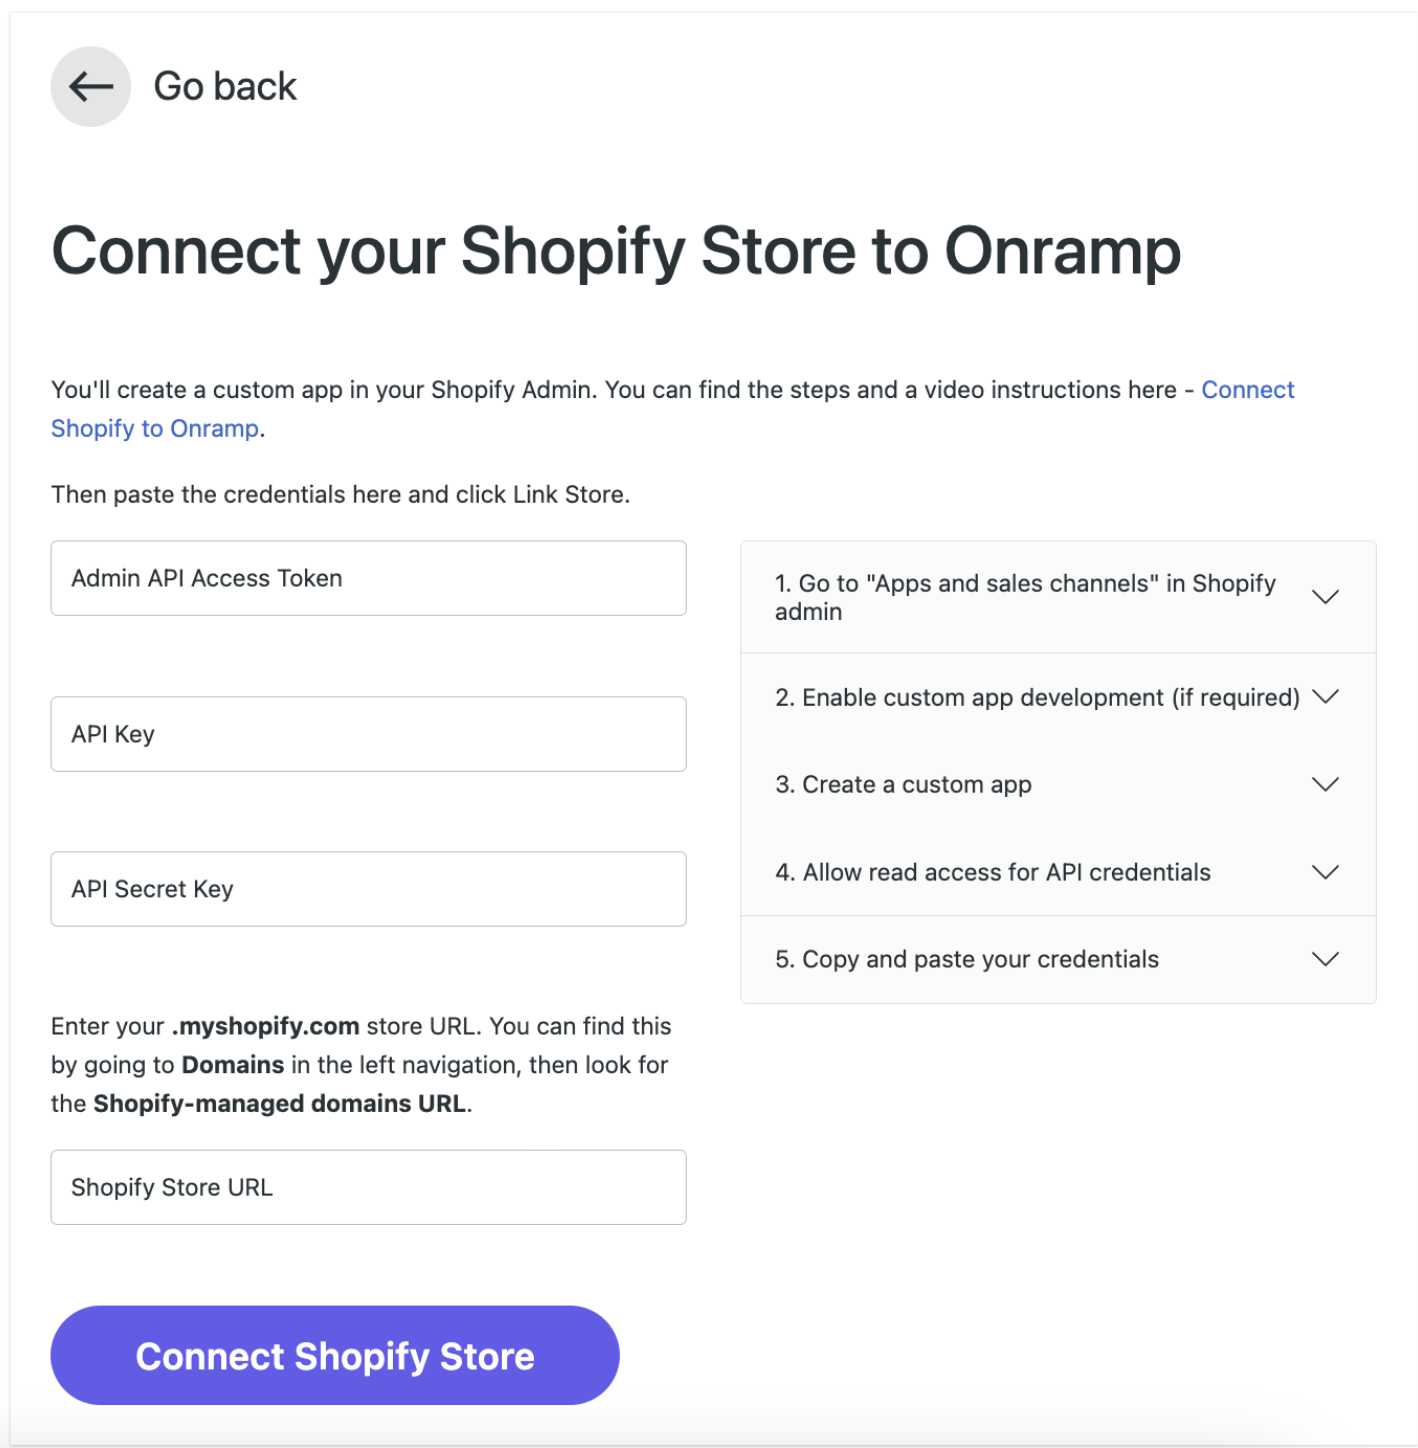
13. Go back to Onramp to paste info on side panel
Paste your credentials into Step 5 on the Shopify connection side panel
To located your .myshopify.com URL, follow these steps:
- Go to Settings
- Select Domains
- Look to Shopify-managed domains
- Copy the “.myshopify” in the URL
Congratulations - you did it!
Thank you for going through these steps!
Your store is now connected to Onramp and we’ll do the heavy lifting from here. We are excited to get you the cash you need!